Posts

Showing posts from April, 2020

Cake slice box || Pastry box || DIY

Image
Cake slice box || Pastry box || DIY Hy folks, I have a fun and interesting project to share with you all today. And you don't need any dies to make it. Super fun, super easy, no rocket science and very quick to make. Looks tempting. But, it isn't eatable though. Well jokes apart, this project will be perfect for all the occassions birthday, wedding favours, anything. You can also arrange it in cake pattern and place it on the table for your guests as takeaway gifts.  So, the measurement is quite basic and simple. All you need is a single piece of cardstock. Measurements : 11*7" sheet  Score at 5/8, 3 and 7" on 11"side. Score at 2 1/4 and 4 3/4" on 7" side. Also score at 1 3/4" and 5 1/4" upto first score line rotate 180° and repeat the same on other side. Turn towards 11" side 5/8" being on your left, notch at 3 3/4" on top and bottom both. Using a pencil and scale make a triangle. Please, follow vide...

Wallet Mini Album

Image
                  Wallet Mini Album Hy folks,  the photo folio or the mini album I will be sharing with you today, actually I had made it quite a long time back. I totally love it and I am sure you too will do it.   In this step by step tutorial you will learn how to make this Photo Album that you can give it like a gift for Valentine's Day, Mothers Day, Birthdays etc. With this handmade Album you can prove to your loved ones that you care about them & you are willing to create special gifts and not just buy them.  I will be sharing all the measurements with you in this blog. For step by step instructions, please follow the video. Measurements of plain cardstock: Base - 8*11" (score at 3 1/2, 3 3/4, 7 1/4 & 7 1/2" on 11" side) Pocket - 2 1/2 * 9" ( score at 1/2 & 8 1/2" on 9" side and 1/2" on 2 1/2" side) Waterfall - 3 3/8 * 5" -8pcs (score at 1/2" on 5" side) Flap - 4*8" ( score a...

Wrapper Boxes | Treat Box | Party Favour

Image
Wrapper Boxes | Treat Box | Party Favour Hello folks, today I have a very cute and adorable treat box to share with you all. Ever since I saw this on Pinterest I knew I have to make these. And it turned out pretty well.  I made them from 6*6 1/2" sheet. They can perfectly fit in some chocolates, tea-lights, nail paints or any kind of small treats.  It has self closing sides. These will work great as party favour gifts on birthday, anniversary, baby shower or any occasion. You can customise it as per your requirement. You can these beauties at the table for the guests as a take away favour gifts. So, let's get started and make these beauties. I have taken a 6 * 6 1/2" sheet. *Score at 1/2", 1 1/2", 4 1/2" and 5 1/2" on 6" side. *Score at 6" on 6 1/2" side. Turn 90° on 6" side. Fold the sheet at 1 1/2" side and make notch at 1 1/2", 3" and 4 1/2". Unfold the sheet, then score from the ...

Paper pyramid gift box | pyramid box

Image
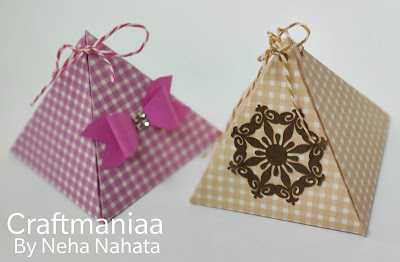
Paper pyramid gift box | pyramid box Hy folks, although I have been making 3d albums, folios, flowers...even tried hands in decoupage but I always have had obsession with gift boxes. And when I saw these Pyramid Boxes I knew had to make some. So, here they are. They are very quick and easy peasy to make. The scoring is quite simple. You can make as small or as large you want very easily.  It is easy to open and close and can be great as wedding favours or any occasion favour gifts. You can fill in some jewellery, chocolates, jewellery or anything in it. Let's get started. To make them you need to take 12*12" sheet. *Score at 4" and 8", turn 90° and repeat same scoring. *Take pencil and make a mark at 6" on all the four sides. Now draw a triangle from 6" point upto the first score line on all four side. Now, leaving almost 1/2" gap from the triagle cut it off.  With the help of scale and bone folder or stylus draw score lin...

Flat fold handbag gift bag

Image
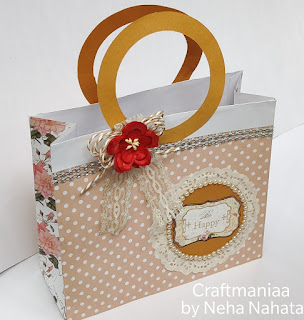
Flat fold handbag gift bag Hello everyone, Today I have very interesting project to share with you all. It's a flat fold handbag gift bag. I am in love how it have turned out, better than that I have had in my mind. It's a lovely project, perfect for any occasion. It can be customised as per the need. And the best part is you can store it convinently as it folds flat. I have listed all the measurements below along with reference template. Please, trim off the part with "X" mark. So let's get started. To make this you will need *2 pcs of 8*8" sheet 1 sheet you will score at 7" that will be our front. 2nd sheet you will score at 1 1/2" & 7" that will be our back of the gift bag *3 pcs of 4*8" sheet One will be base and two sheets will be our sides For base - score at 1/2" and 3 1/2" on 4" side For sides - score at 1/2" and 3 1/2" on 4" side and score at 1" an...

Mini backpack gift bag

Image
Mini backpack gift bag Hy folks,  I am very excited to share this cute bundle of goodness with you all. This would be just perfect for birthday favour gift, back to school gift, teacher's day, father's day or any day. With right choice of papers, it will fit in any occasion. You can gift stationery, chocolates, nail paint or any thing of your choice. For this you will need 2 sheets of paper. It's very economical. So, let's get started. I am uploading a reference template to make you clear about scoring. You will need to trim off the "X" marked part. *1 pc of 8 1/4 * 9 1/2"  Score at 1 1/2" and 6 1/2" on 8 1/4"side  Score at 3", 4 1/2", 7 1/2" and 9" on 9 1/2" side. *1 pc of 2 1/4" * 1" *1 pc of 2 3/4" * 1 1/2" *1 pc of 5 3/4" * 3"  Score at 1/4" and turn 180° and score at 1/4" on 3" side  Score at 2", 2 1/4", 4 1/4...

Pillow box without die

Image
                      Pillow box without dies Hy Folks, Today I have a very cute and easy project to share with you. You can make it with minimal craft supplies that are easily available. And the best part is there is lot of scope to creative in making them. These can be made quickly. You can store by folding flat and can get them to shape as required. The basic rule that I follow while making them is take any size of square sheets like 12*12" or 8*8". This is made using 12*12" square sheet. Score at 5 3/4" and 11 1/2" . Burnish along the scored lines. Now for the pillow part, you will need something circular or oval shape guide to score along the pillow box. The size of the circle or oval guides the size of your pillow box i.e, how fatter or flatter or curved you box is going to be. Watch my video to understand where you need to make your curved size scoreline. Here, I am uploading a reference picture from in...